It has been long pending exercise to try out Luminosity mask techniques on some of images. The trick is to practice more to get desired results. The luminosity masks allows you to selectively edit the tonal regions in images. This technique widely used to balance out the various tonal ranges of the image. The crux, as stated previously is to practice more and understand the image to choose right mask. I used GIMP to create Luminosity masks with help of excellent tutorial which can be read here (
GIMP LUMINOSITY MASKS). It has been long time since I dwelt into the theoretical aspects of this technique and now it's finally time to début my tryst with luminosity masks :D.
Here is the image which I wanted to try desperately enhance. What is the worst time to shoot a photograph of waterfall? Yes, i.e. during midday :( when waterfall is under half shade and half sun (luminous of sun!). The pictures turn out too much contrasty and as a result, the image has overly highlights in it. The only technique I could use here to selectively edit the brightest part and balance with shadows. One may argue as to reduce the brightness or curves, before trying those techniques, experiment on your own! Yes, it darkens the shadows also. In picture below, the darks and mid-tones are preserved without loss while the highlights are considerably cooled down!
For the below image, I used four masks LLL, LL, L & D. I did not experiment with Midtones mask. Since my primary intention was to vanquish the blown out highlights, the major focus was on LLL & LL masks. Manipulating curves with LLL & LL masks, I obtained the desired results with additional operations like sharpness, contrast, and saturation. For D mask, I increased curves a little bit to add more charm to first level of shadows! At the end of editing, I was exhilarated to see the results. Hope I had absorbed this concept a lot earlier. From here on, I would like to experiment more on masks and share my experiences in my literary yard :). Remember, working with luminosity masks requires lot of patience and dedication. It may take even days to edit the picture to perfection!
Last but not least, honest feedbacks are always welcome :)
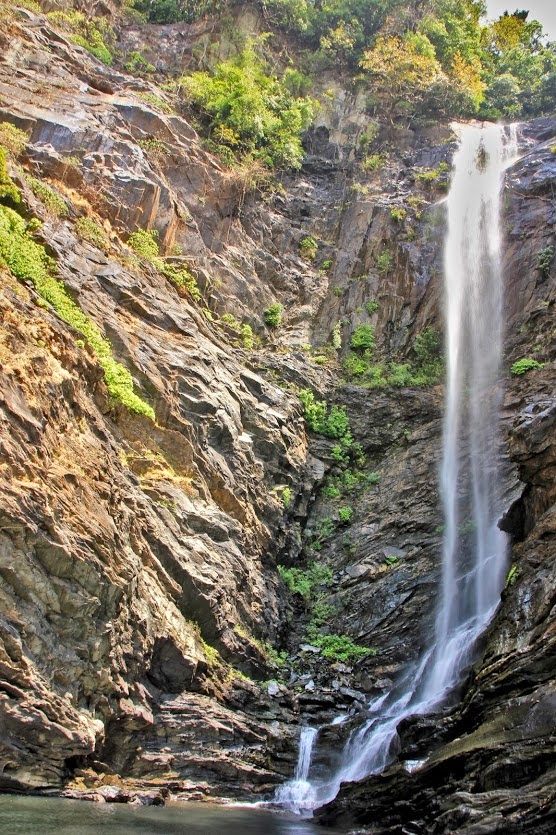 |
| BEFORE MASK |
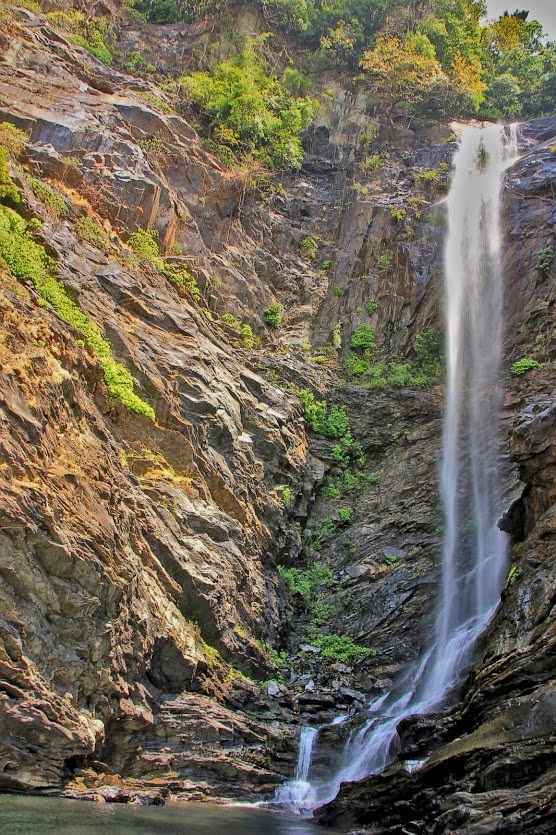 |
| AFTER MASK |
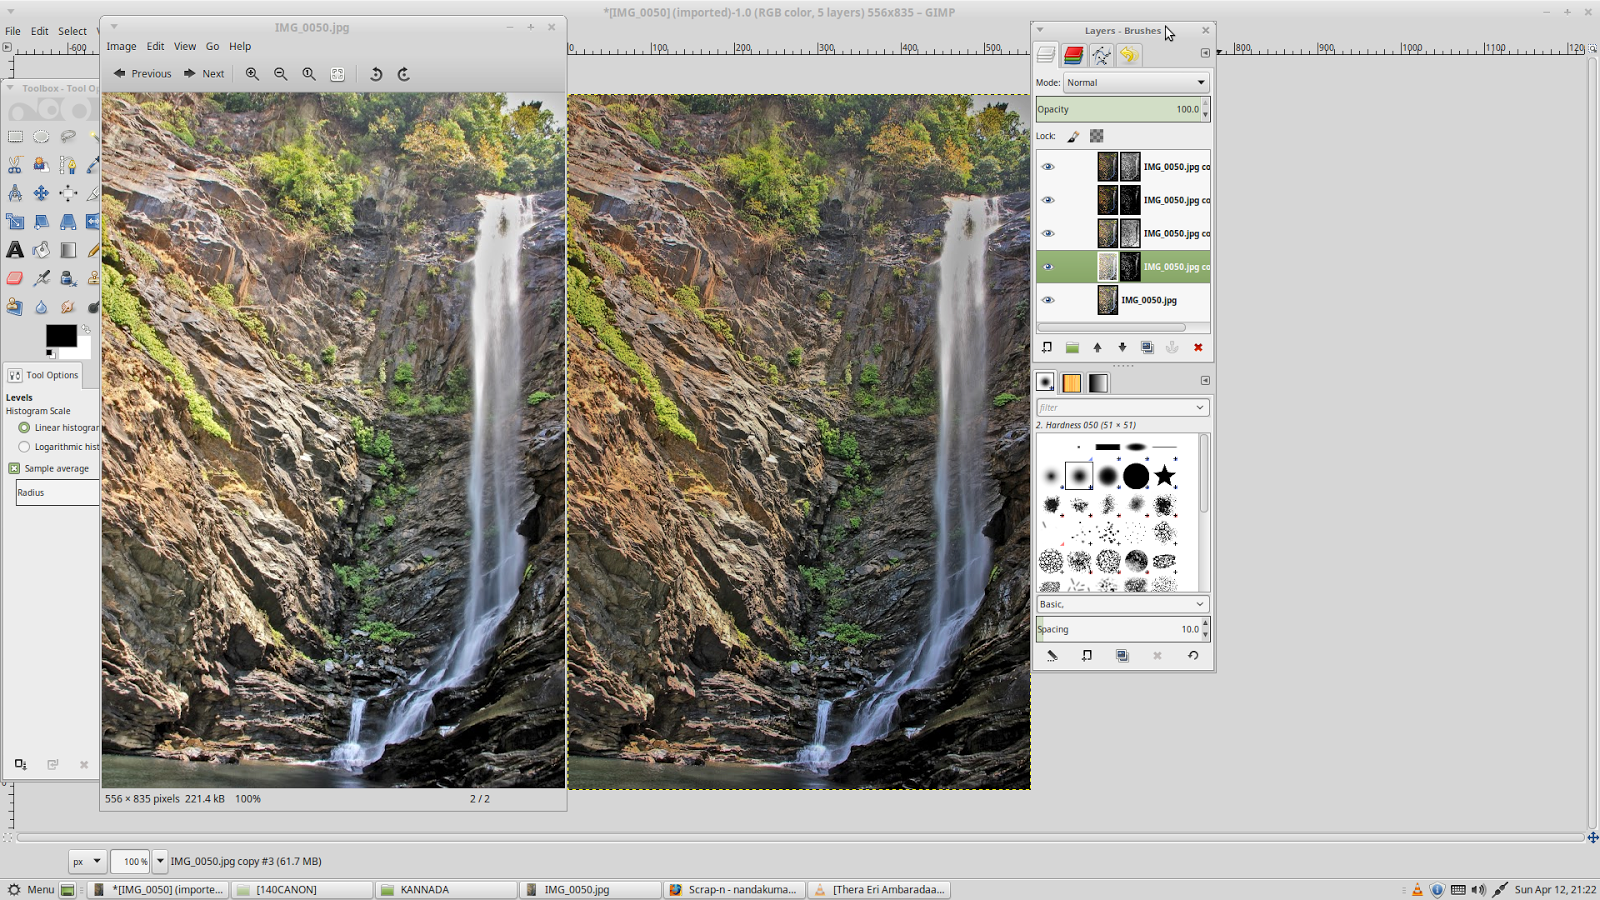 |
| THE GRAND SETUP ;) |
Frankly I preferred the 1st image, seems more natural. Just my 2 cents. I think if you had to work on the midtone contrasts, the 2nd image could have been better.
ReplyDeleteCheers!
nice falls
ReplyDeleteBeautiful waterfalls! Enjoy your day, wishing you a great weekend!
ReplyDeleteNicely shown
ReplyDeleteGorgeous waterfalls and dynamic photo ^_^
ReplyDeleteBe Safe, Be Well,
A ShutterBug Explores,
aka (A Creative Harbor)
In my opinion, the results of both photos are good.
ReplyDeleteAnd based on the experience that I've never met, the morning light and the evening light look more produce good lighting in the photos.
Greetings.
Beautiful waterfalls! Great photos! Happy Friday, enjoy your weekend!
ReplyDeleteGreat waterfall.
ReplyDeleteBeautiful color. I love the flowing of the water.
ReplyDeleteBeautiful ~
ReplyDeleteLive each moment with love,
A ShutterBug Explores,
aka (A Creative Harbor)
I have never tried this technique. It sounds challenging.
ReplyDeleteBeautiful! Happy to discover your blog
ReplyDeleteI enjoy your composition very much. Thank you
ReplyDeleteYou have more patience than I do.
ReplyDeleteSo much to learn! Very nice picture. Cheers - Stewart M - Melbourne
ReplyDeleteThis comment has been removed by the author.
ReplyDeleteThe waterfall is a stunner. I like how it comes out unedited
ReplyDelete